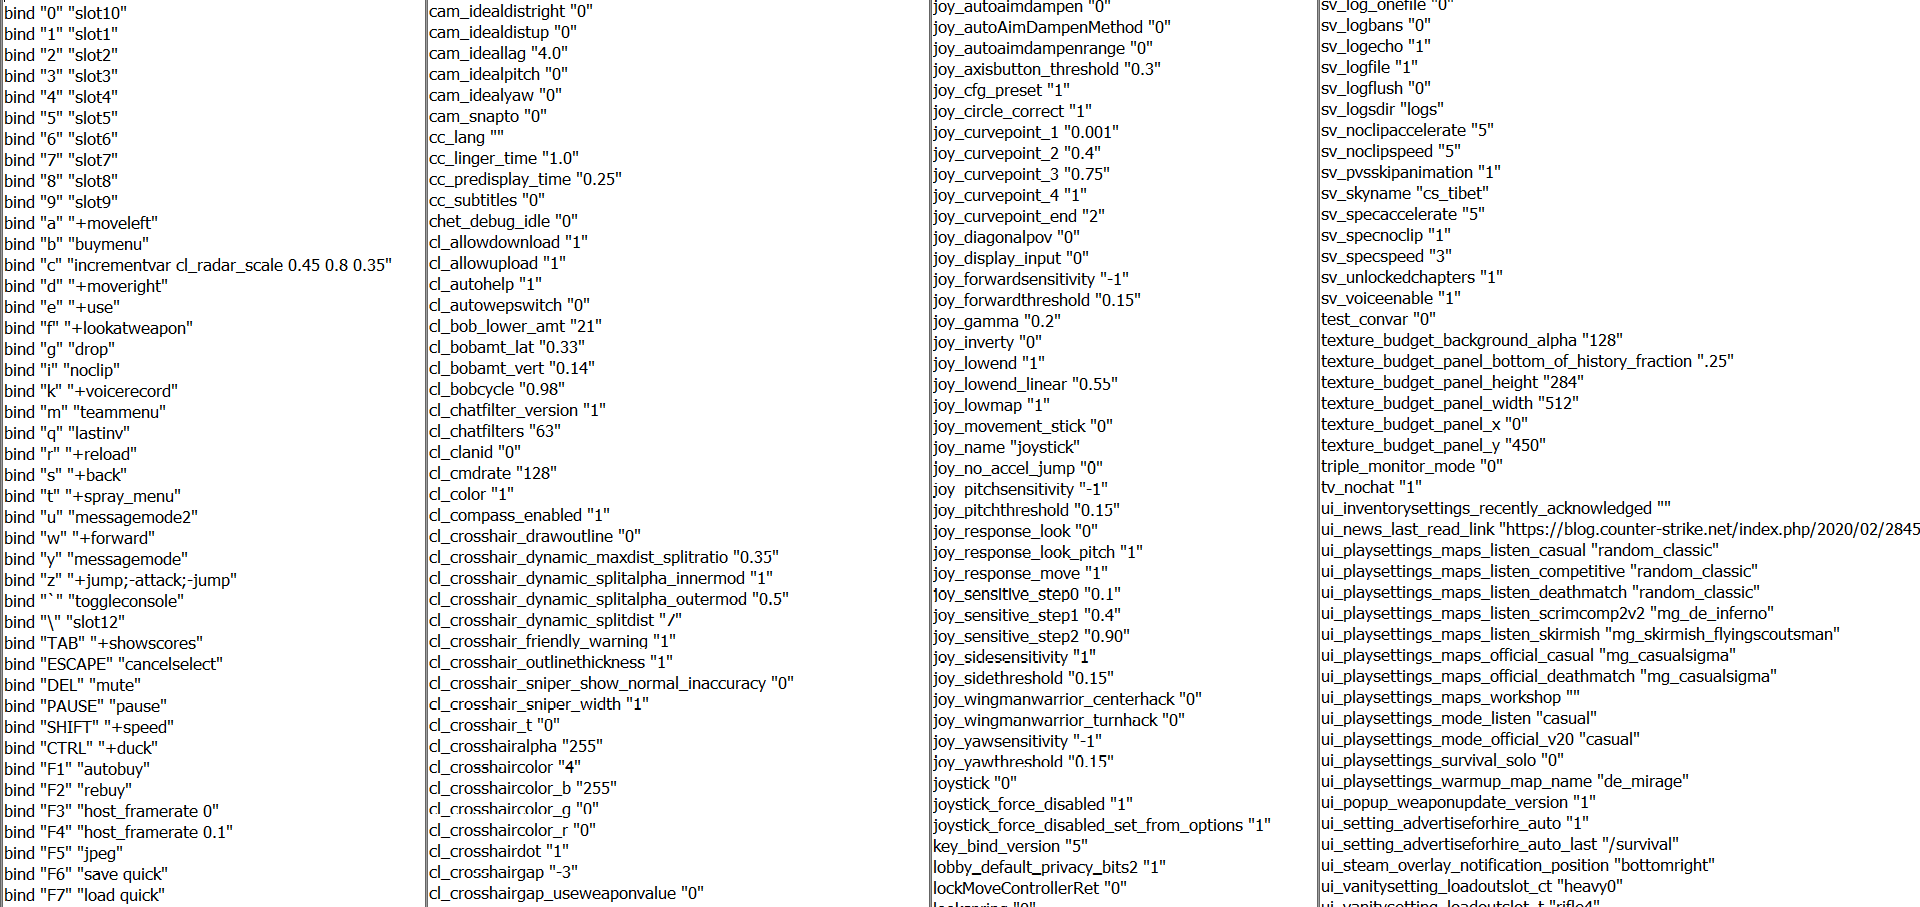
Each Counter-Strike: Global Offensive player has their own config. Basically, config.cfg files contain all the game settings, binds and other parameters. Pro players’ configs are different because these dudes know how to squeeze the maximum with minimal PC load, additionally including and using the best binds in the game. CS.MONEY Blog tells how to install best esports players configs into your CS:GO. Surely, learning from the best of the best is a must. So, let’s download s1mple’s config, install it and try it in the game!
Before talking about where to put CS:GO configs and study the details of s1mple’s settings, let’s recall that enjoying CS:GO is better with skins! The easiest way to upgrade your skins is CS.MONEY Market, with new UI, cash withdrawals, and quick deals!
Why install other people’s configs?
Back in the days of Quake, config was a huge part of success. A properly tuned game made almost visible advantage. Therefore, many Quake fans copied the configs of the best players in order to become better. In CS:GO, configs do not have such a magic effect, but it’s still reasonable to adopt configs from the pros. The fact is that their configs contain all the settings for high-level competitive play. So asking why should you use pro players configs is resolved.
Step One: Finding Pro Configs
First, you need to find a config file. We decided to take s1mple’s config as an example. You can download his config on prosettings.net (click the link to do it). After that, just unpack it insert the files into a special folder. Apparently, this archive has three files, but we’re only interested in config.cfg.
Important thing: rename the config file. Then, when transferring, you won’t have to replace your config with a new one, and if something happens, you can quickly return to your usual settings. We did just that by renaming the config from the standard name to the player’s nickname.
By the way, if you are thinking about starting your esports career in CS:GO (or just want to get better at playing the game), you can start training like s1mple! Here’s a separate article including all s1mple’s trainings and tricks.
Step Two: Open Your CS:GO Folder
All configs are in a separate CS:GO folder, so you need to find it. Do as follows:
- Open File Explorer
- Go to your system drive (for example, Drive C)
- In Program Files x86 find the Steam folder, then /userdata
- There, open the folder with numbers. This is your username.
- Then, open folder “730”, which is the number of CS:GO’s application in the Steam file system
- Copy the config file to this folder.
- You’re ready to go!
Note that the default config.cfg lies not in the game folder, but here: C:\Program Files (x86)\Steam\userdata\%user number%\730). You need to copy the .cfg file only. Not the whole archive, not the folder, just the file!
Step Three: Config Activation
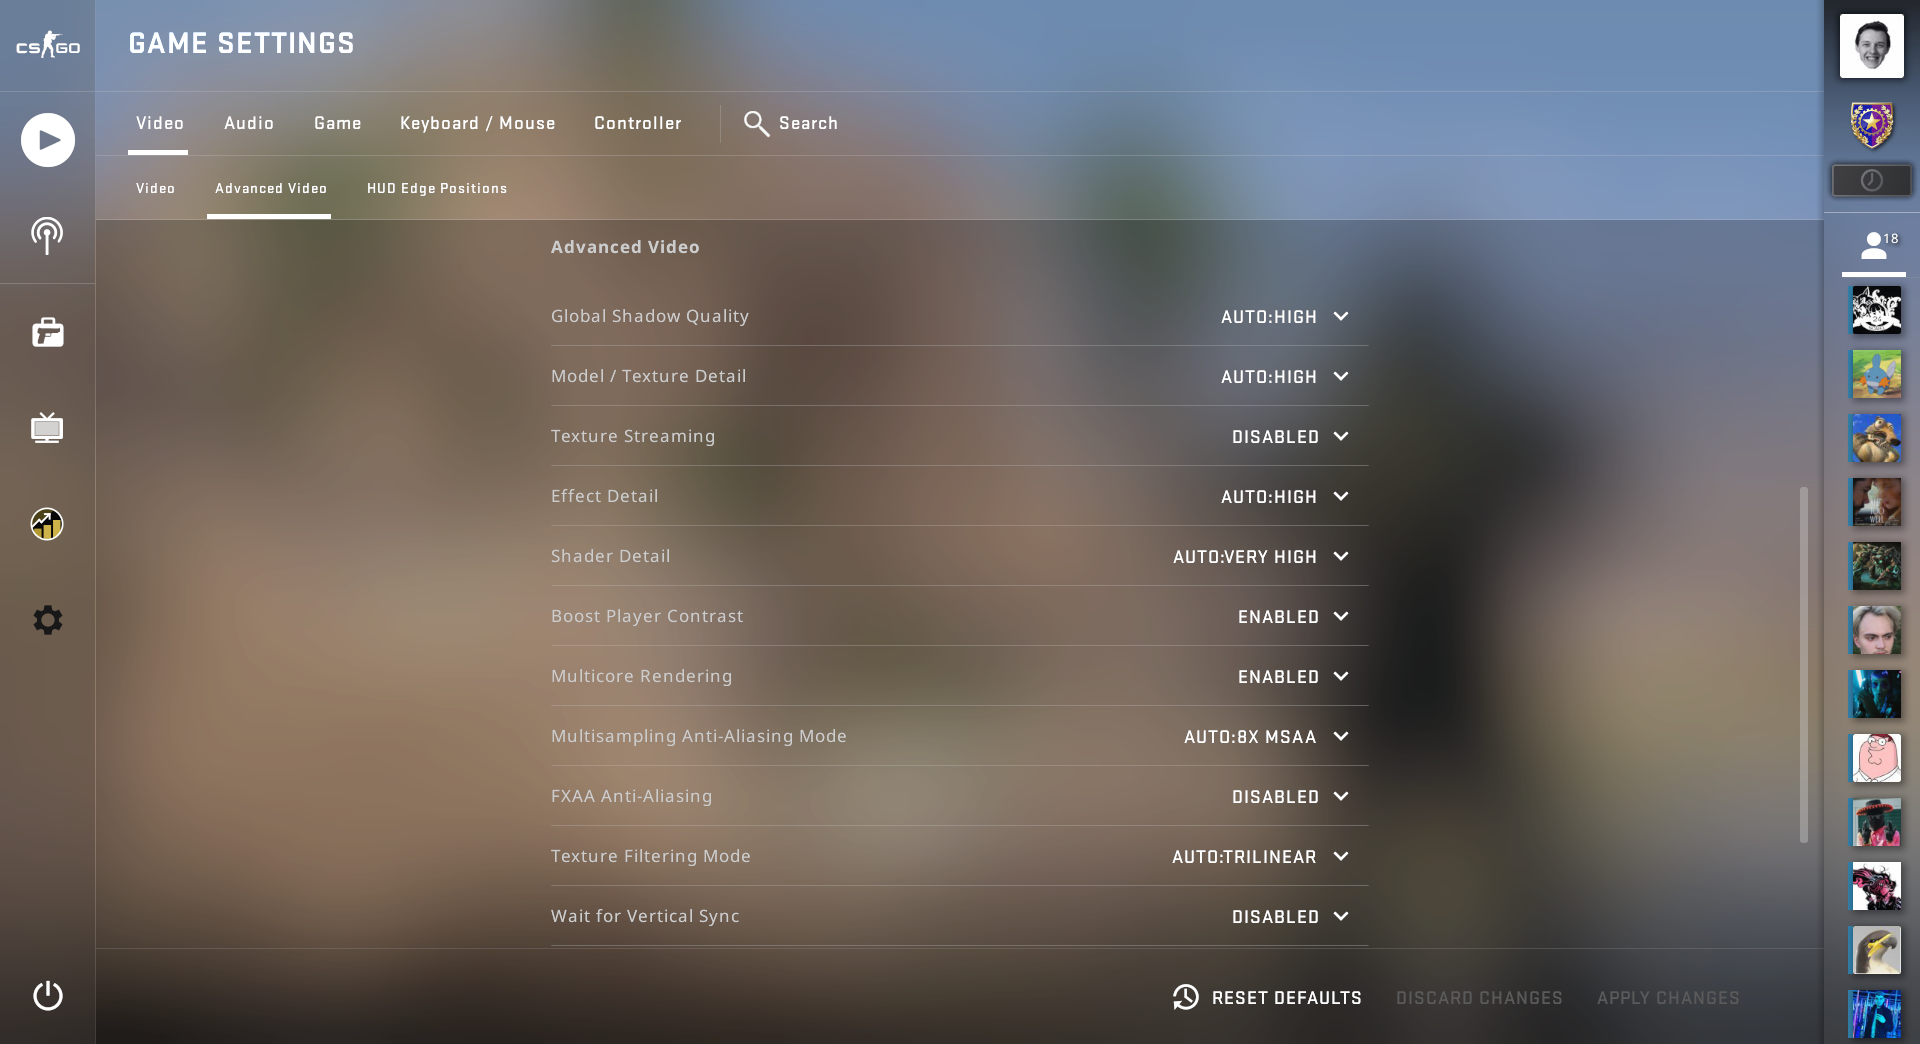
To activate s1mple’s config, launch CS:GO and open the console. By default, you can do it by pressing the tilde (~) key. If nothing happens, check if the console is enabled in the game settings menu. Find “Enable Developer Console” and set it to “Yes”.
Next, you have to type in an exec command. In our case, due to the fact that we renamed the config, the command looks like this:
- exec s1mple
Press Enter and you’re done! You now have the s1mple config installed. But that’s not all!
Step Four: Test and Set Up the Config
After all the operations, it’s time to grind a pub and check the config in action. Did you know that s1mple’s config work with E as Use Item? So, if you want to re-assign it, do it through the game settings or through the console if you know the commands. Alternatively, you can edit the config file directly using a text editor such as Notepad.
Step Five: Save Changes
When you’re ready with your config after all the edits and tests, the only thing remaining is to make it your main one. To do this, once again open the console and enter this command:
- host_writeconfig
After pressing Enter, your default config will be overwritten and you’re done. Now you have s1mple’s config installed and ready to go!
By the way, it’s worth noting that you can copy not only s1mple’s config, but also the world’s best player skins! We have selected best and cool skins from s1mple’s inventory. Be sure to check them out! And remember, all this skins are available on CS.MONEY Market.